Self Service Portal Help
Contents
Access
User should write/ copy aside url to their favourite browser :http://selfservice.iita.org
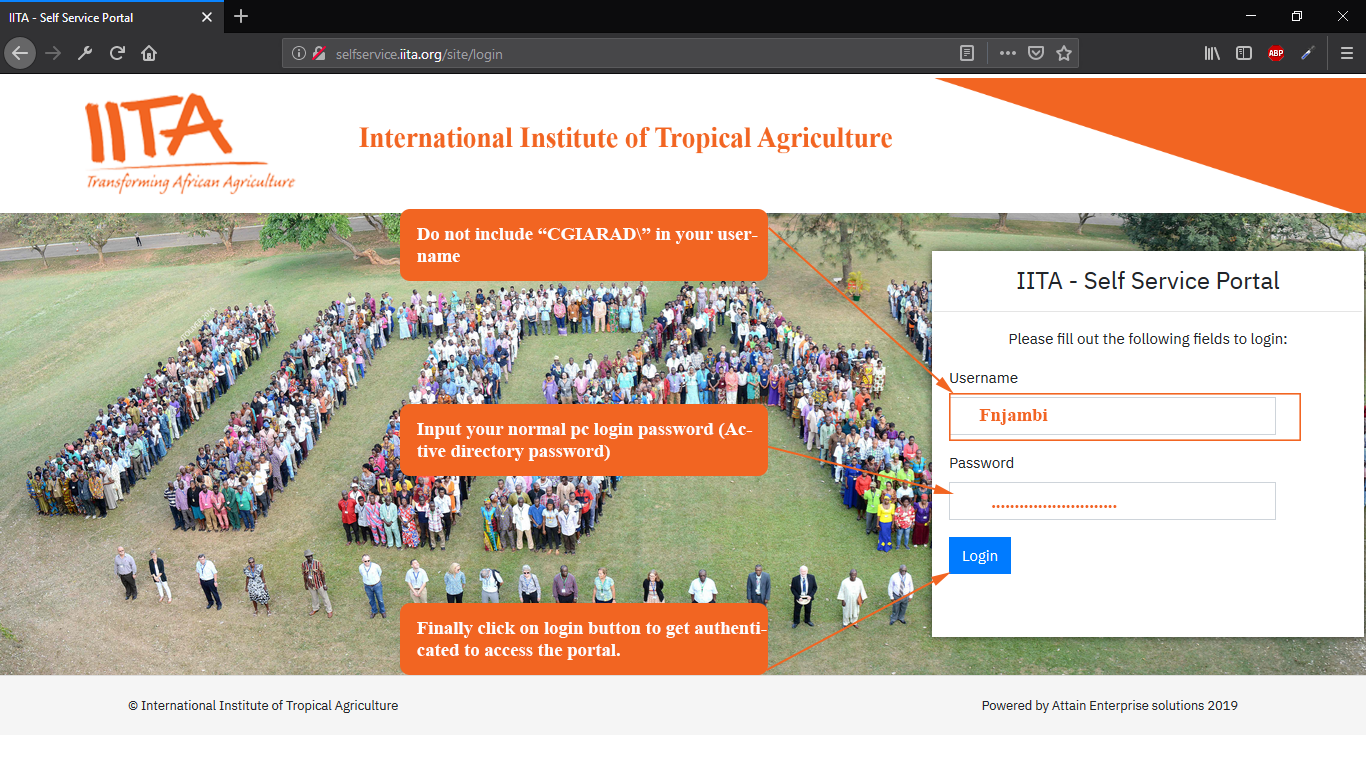
On loggin on the portal url, the user lands on a page like below image.

Portal Login Credentials
To access portal modules the user should enter their access credentias as shown below
Successful Authentication and Login out
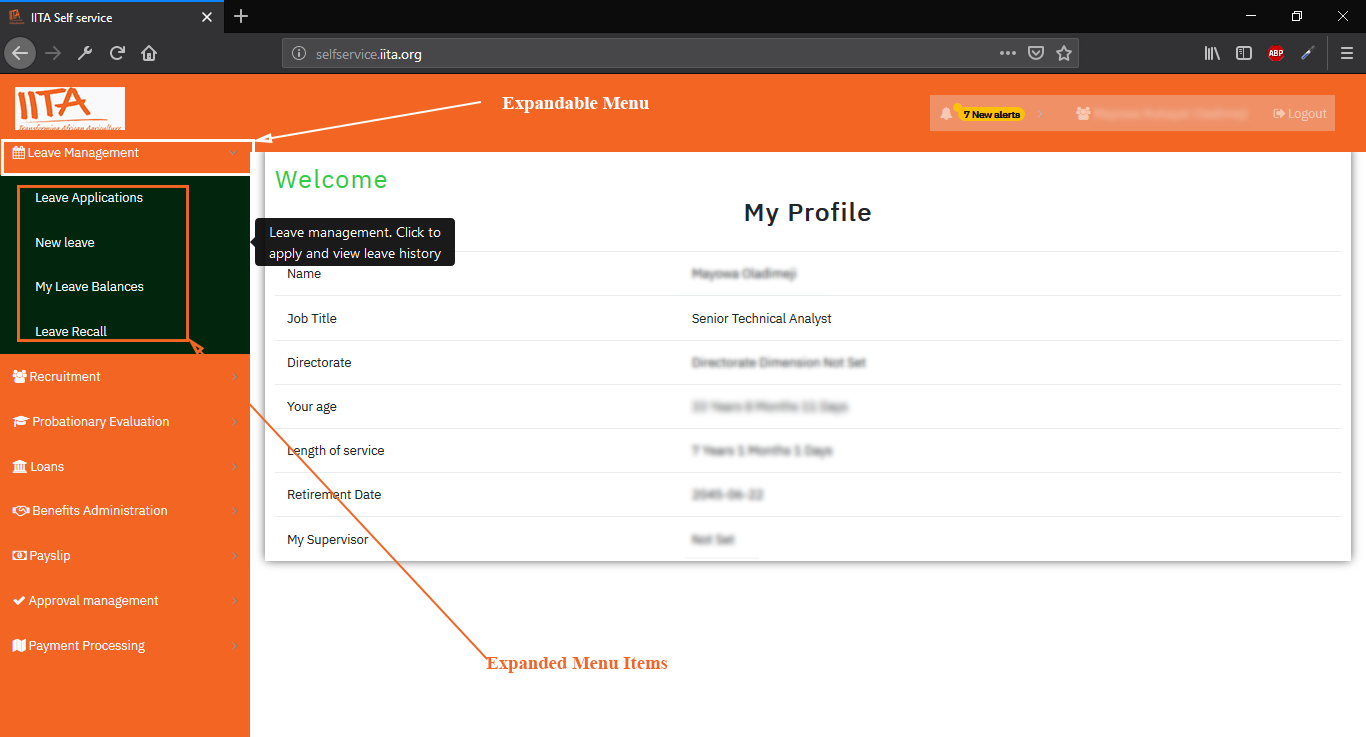
Upon successful authentication the user lands on their profile as show below.
Upon completing tasks on the portal the user should log out for security reasons.
To log out click the logout button on the top right-hand corner as illustrated below.

Portal Navigation
The portal utilizes an expandable menu navigation for every active module. Initially all module top level menu items are Collapsed.
To interact with module items click the top level menu item to expand the menu, as illustrated on the image below
Leave Module
Leave Application
1. Expand the leave module menu as shown on navigation section and click on NEW LEAVE menu item, displays a form like below.
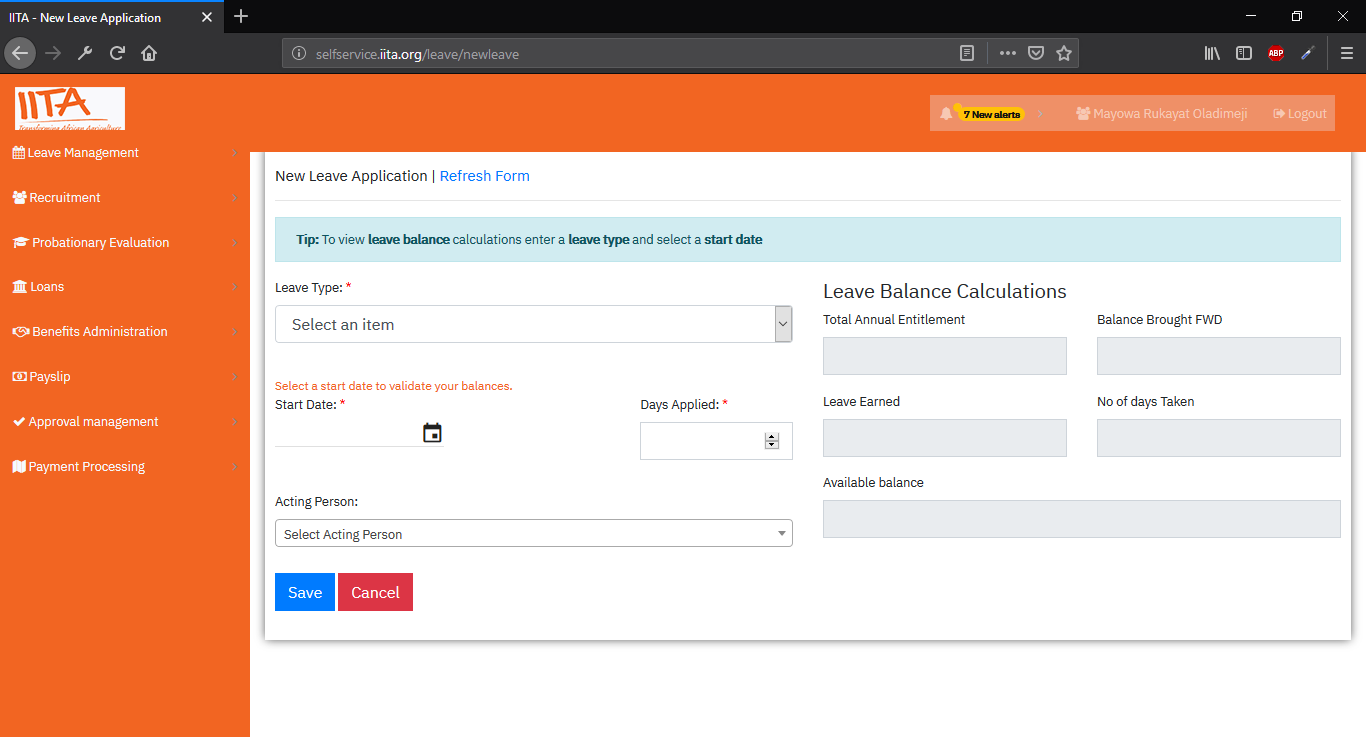
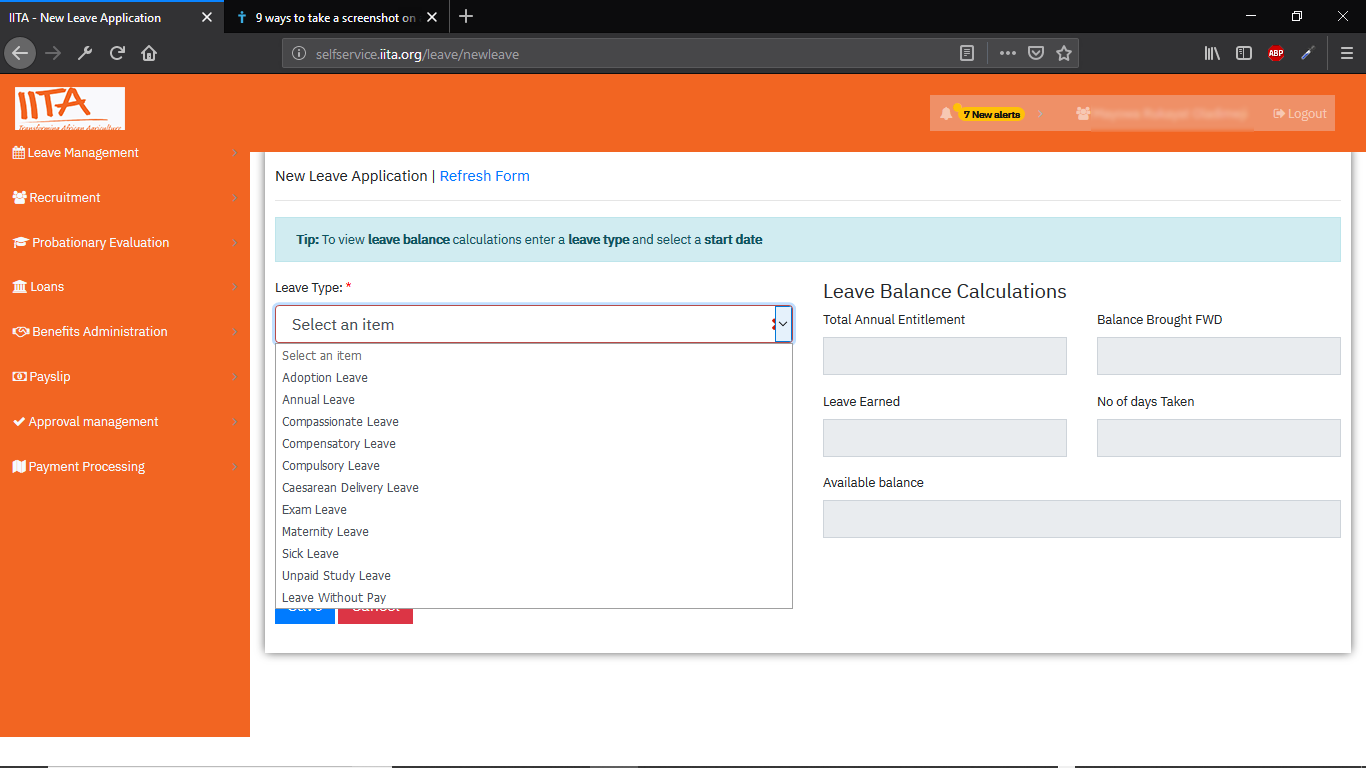
2. Select a leave type as shown below.
3. Select Leave starting date by clicking on the date picker provided, as shown below.
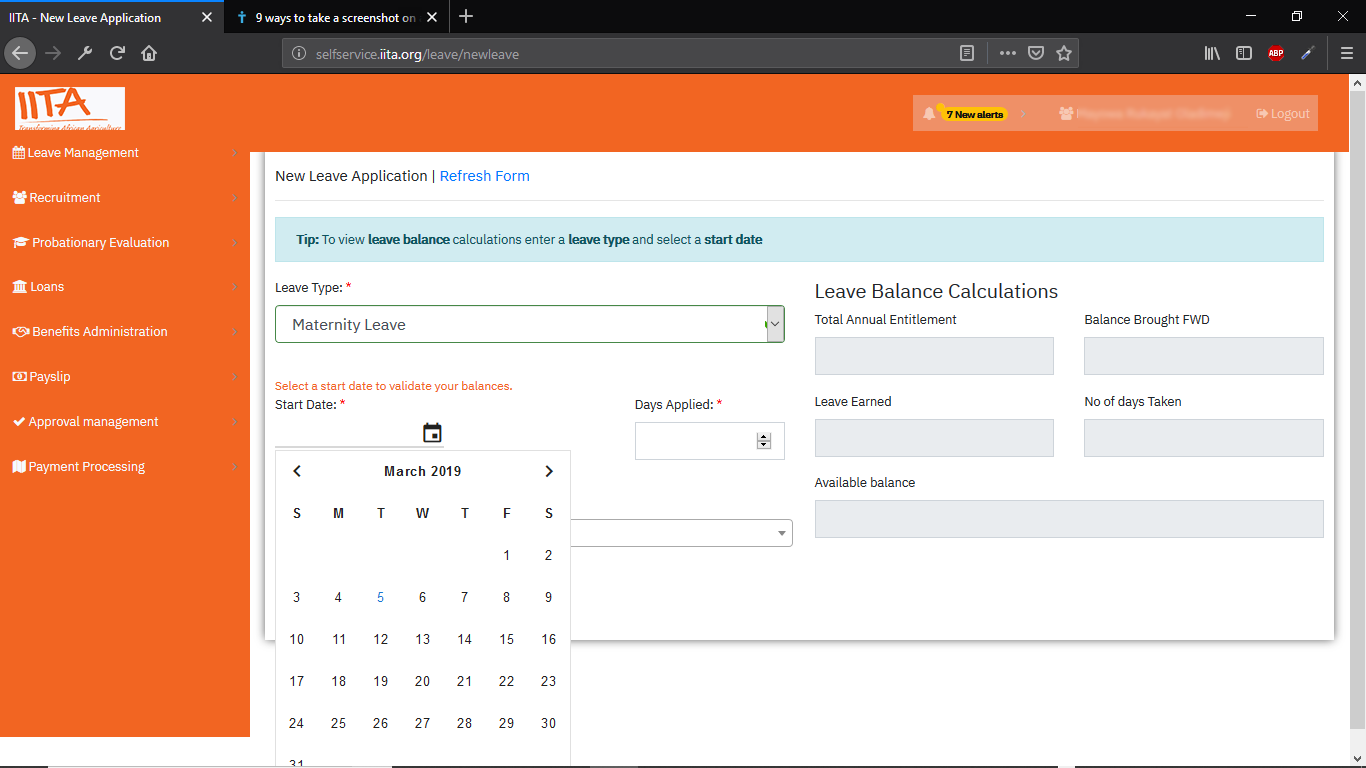
At this stage the inactive form fields under leave balances section should be auto filled according.
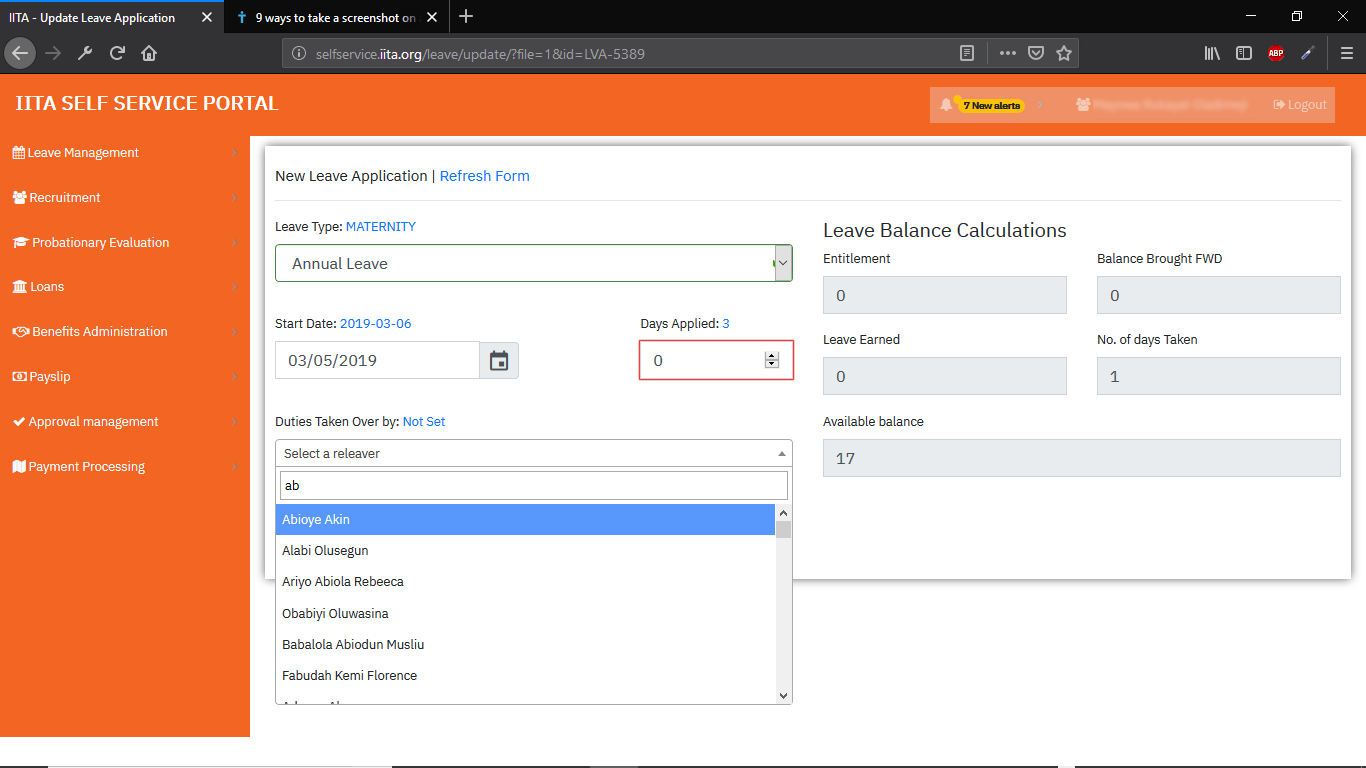
4. Fill in Number of days you are taking the leave for, finally select an individual who should take over your duties while you are on leave.
5. Send Leave application to supervisor for approval
Upon a successful leave application, you must send the leave application for approval.
There are two methods with which you can send a leave application to supervisor for approval
Method I : Use the Send for approval button on the success dialog that shows upon a successful leave application or leave application update. as shown below:
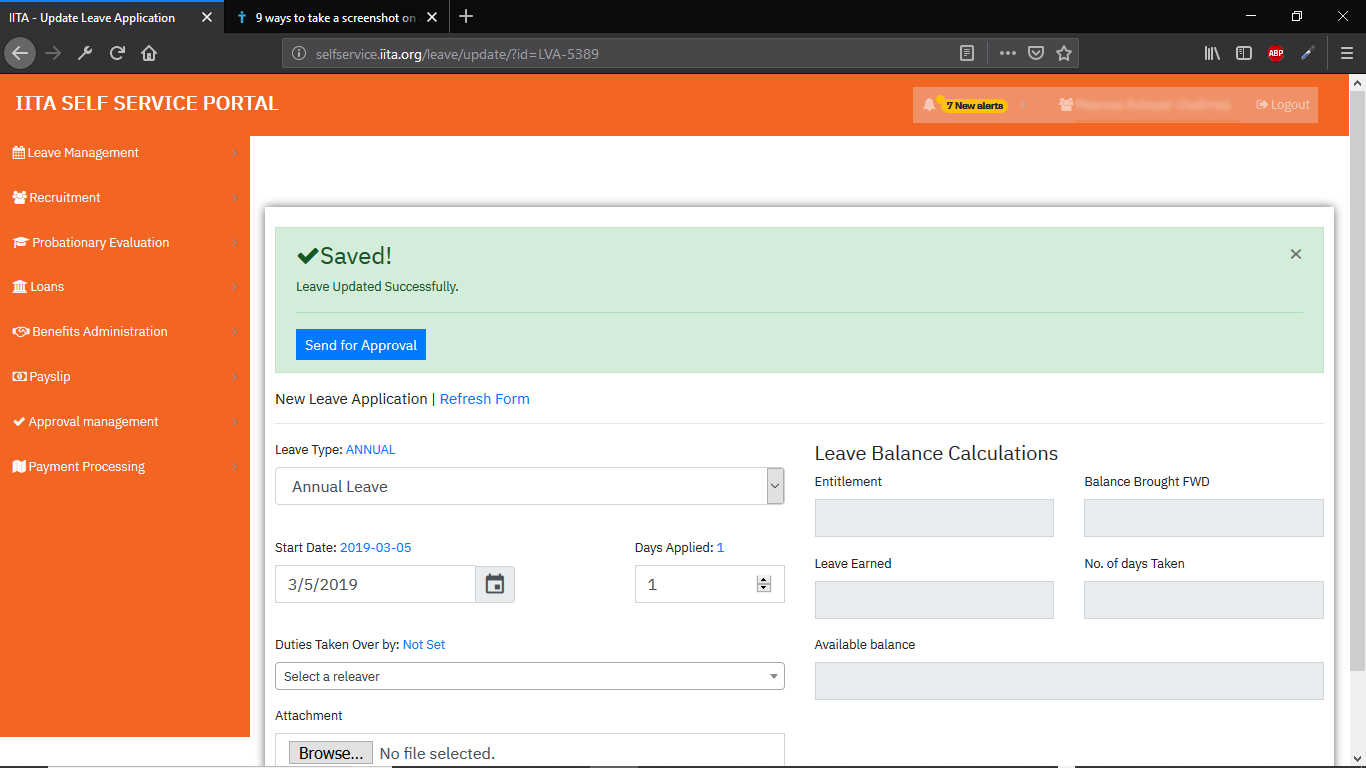
Method II : expand the leave module menu, navigate to Leave Applications and check for a leave with a "send for approval" button and click on it to send the leave for approval.
If a leave is successfully sent for approval, below is a screenshot of what you should see on the screen regardless of the method used.
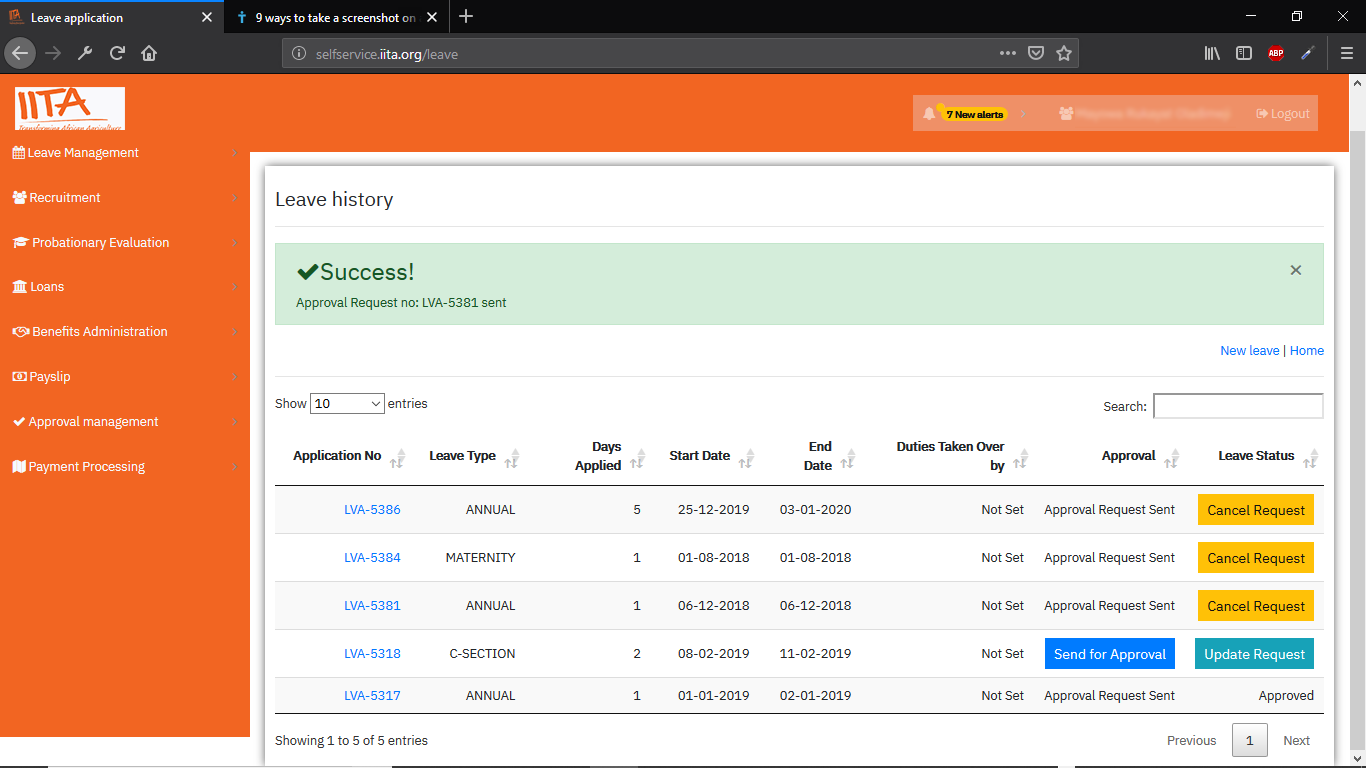
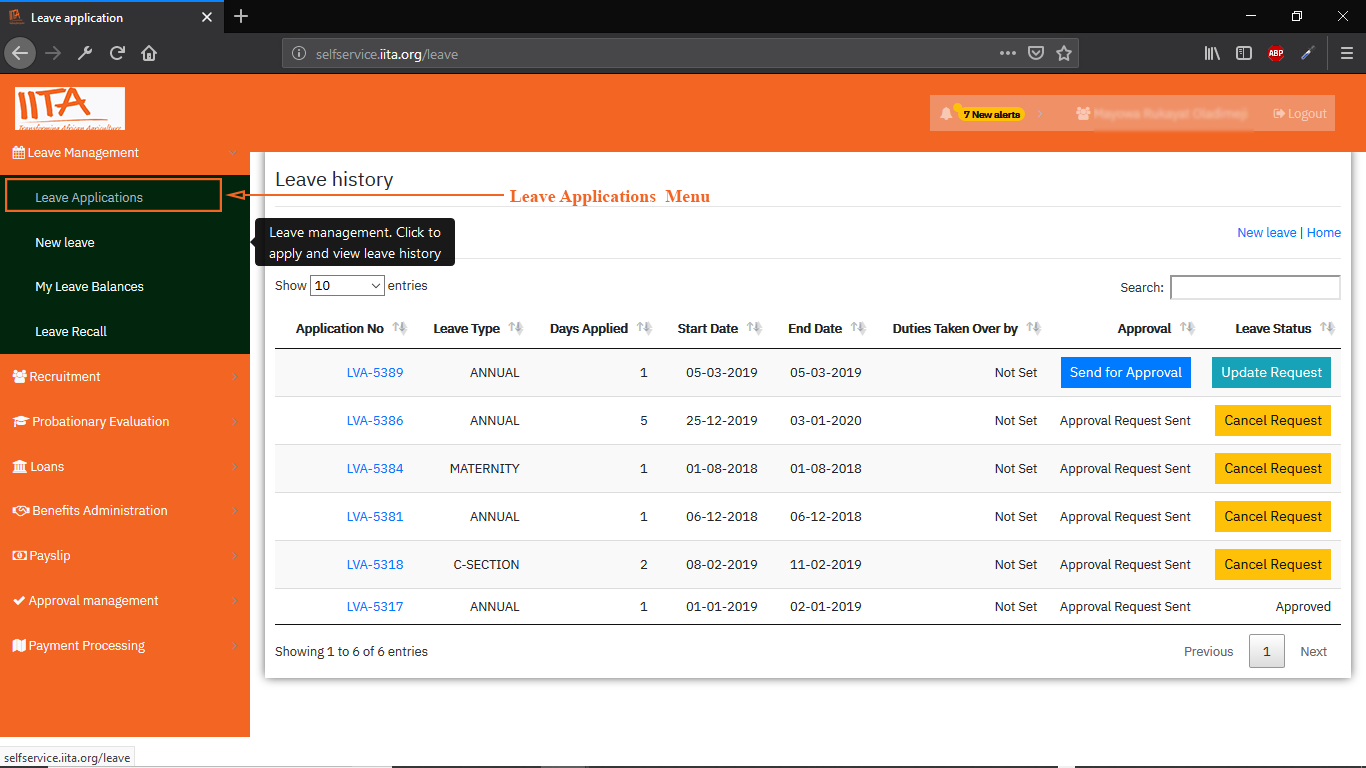
Leave History / Your Leave Applications
To view your leave application history Expand Leave Management Module Menu and click leave applications, as illustrated below.
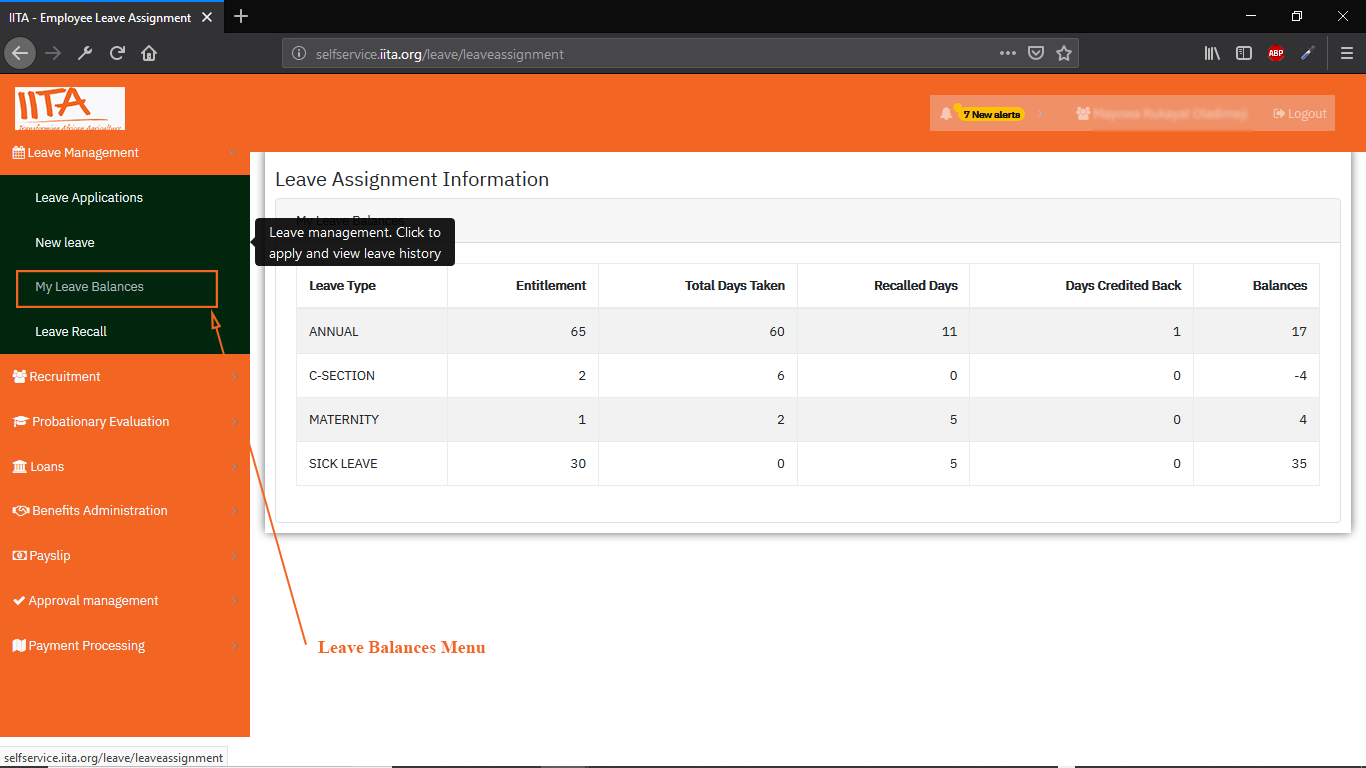
Leave Balances
To view leave balances , expand the Leave management module menu and click on leave balances Menu to view your leave balances for various leave types which you are eligible to apply.
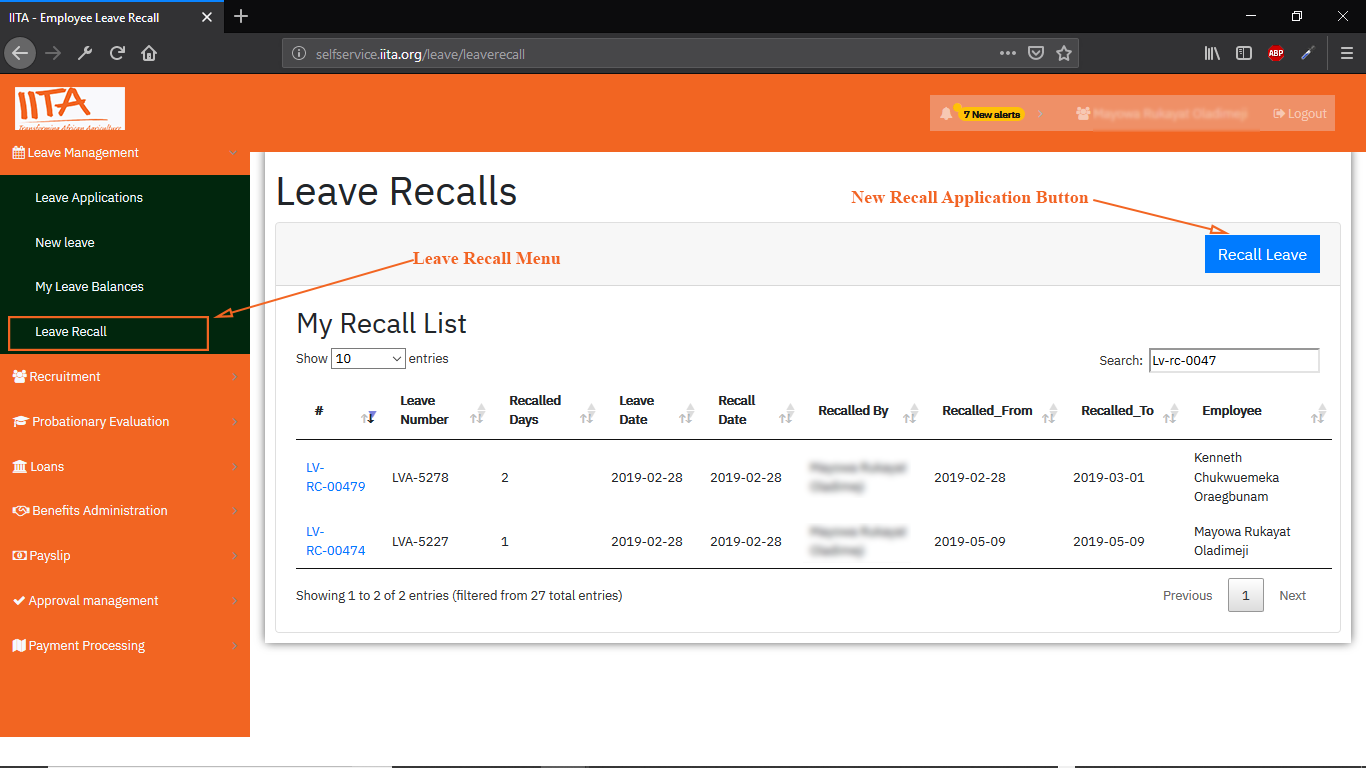
Leave Recall
This functionality calls back from leave for days you are required back to work and it also credits back those recalled days to your leave balances.
To access this functionality, Expand Leave Management Module Menu and click Leave Recall menu as shown below:
Leave Recall Form
To recall a leave , click the Recall Leave button and get to the form below, and follow the steps illustrated in the following image to successfully recall a leave.
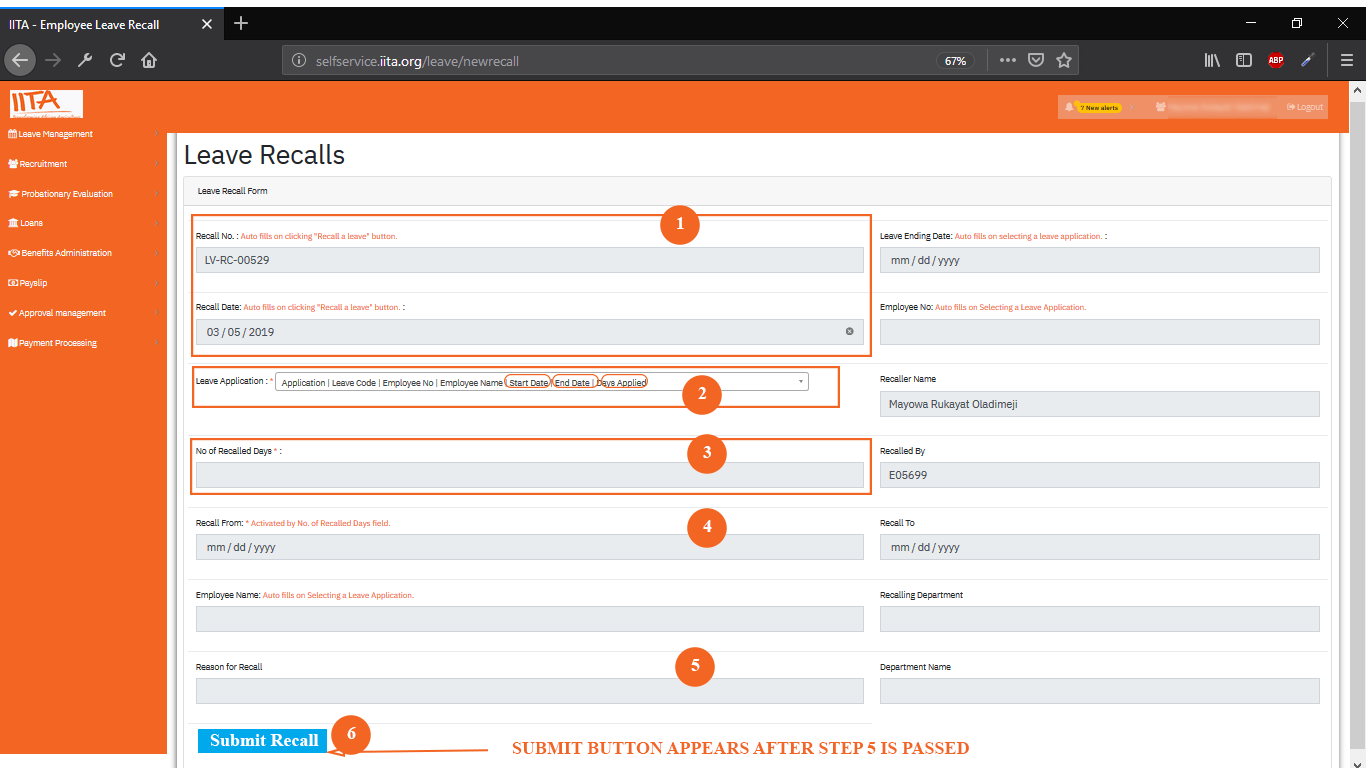
- Step 1: These two fields are auto-filled on page load.
- Step 2: Select a leave type you want to recall.
- Step 3: Input days you want to recall - observe below criteria
- Number of days has to be less than days applied for that particular leave.
- Step 4: Input when the recall should begin ot take effect. This field is activated after step 3 is passed and should be between start and end date of selected leave in step 2.
- Step 5: Input a reason for the recall
- Step 6: A submit button appears when you insert a reason for recall, use this button to submit a leave recall and the process is complete.
Payslip
Accesing Payslip Module
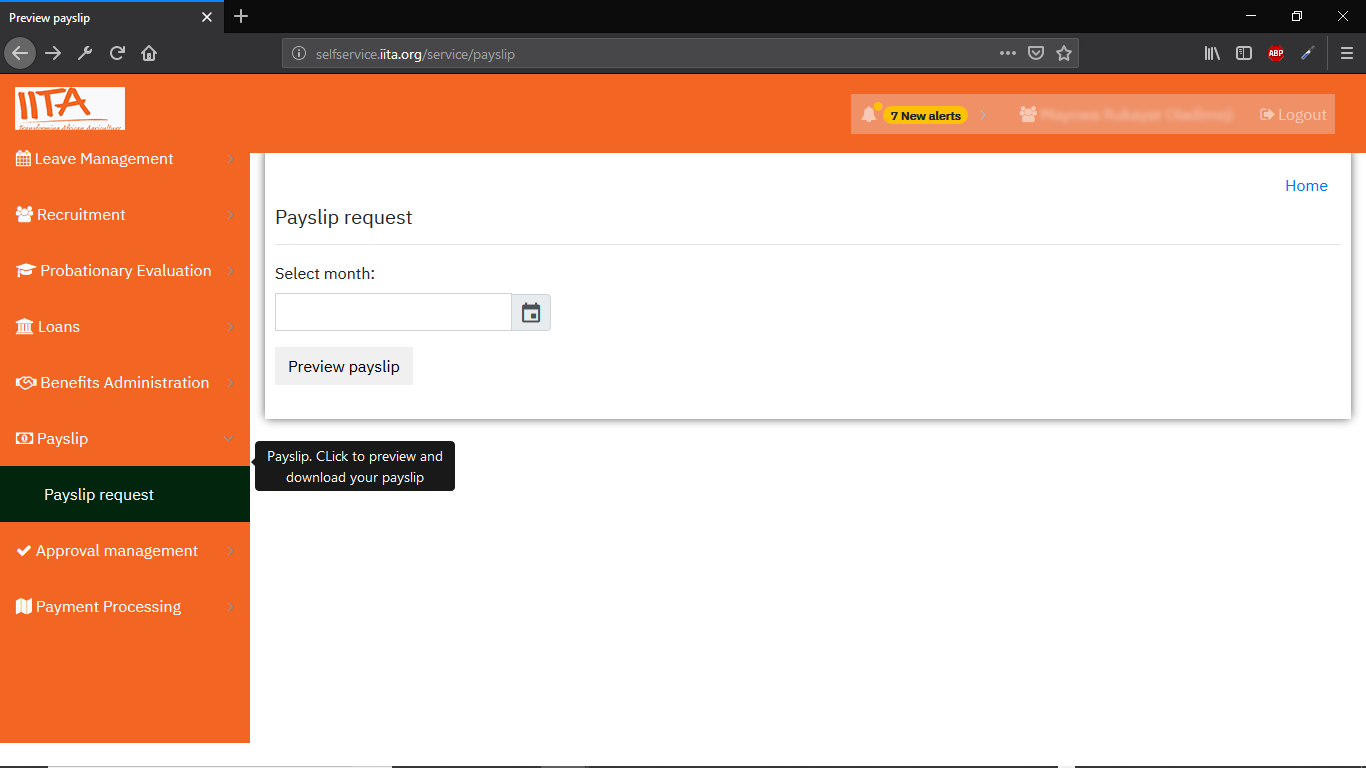
To access your payslip, expand the payslip module as shown in below image.
Previewing Payslip
To preview your payslip, click the Payslip Request link within the payslip menu to navigate to a page like shown below.
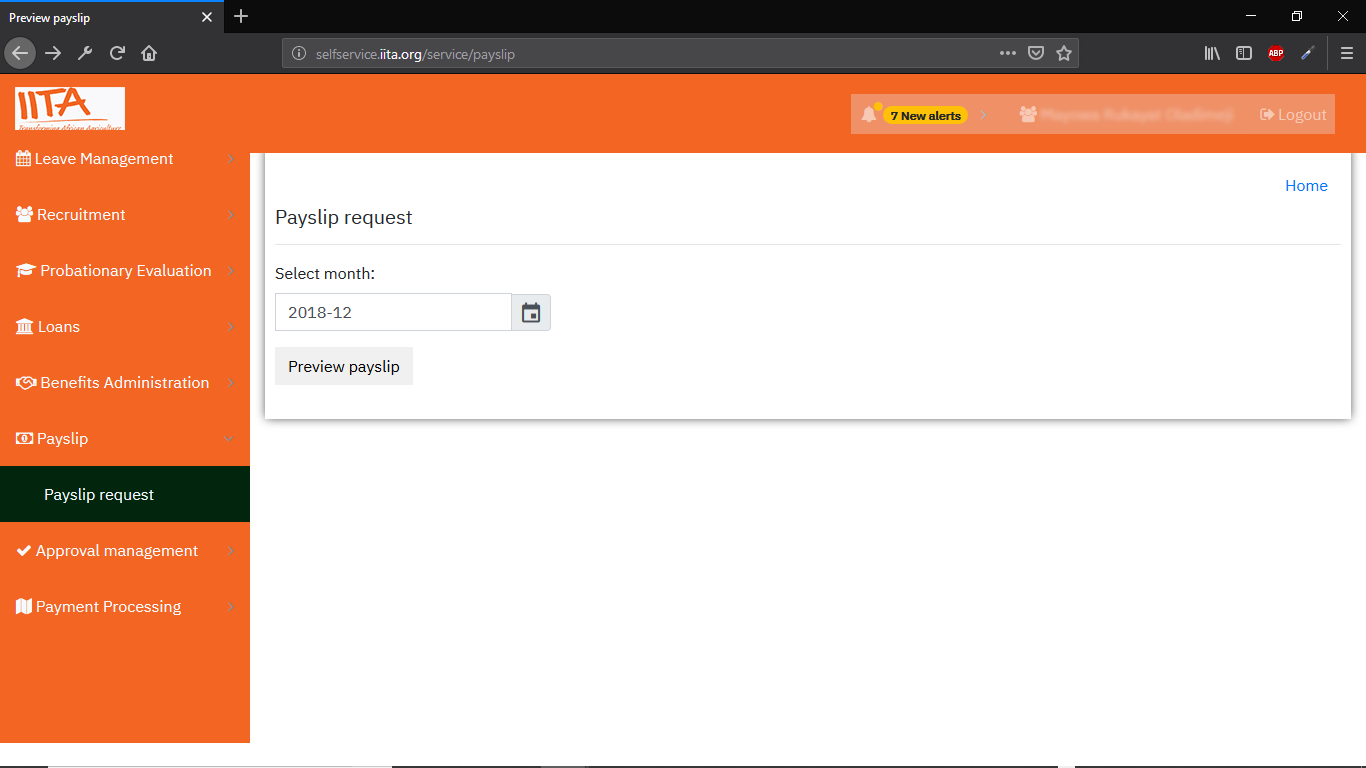
- Use the date picker on the page illustrated above to select a month.
- Click the Preview Payslip button to view your payslip.
Approval Management
To approve or reject any requests navigate to Approval management menu as shown in the screenshot below.
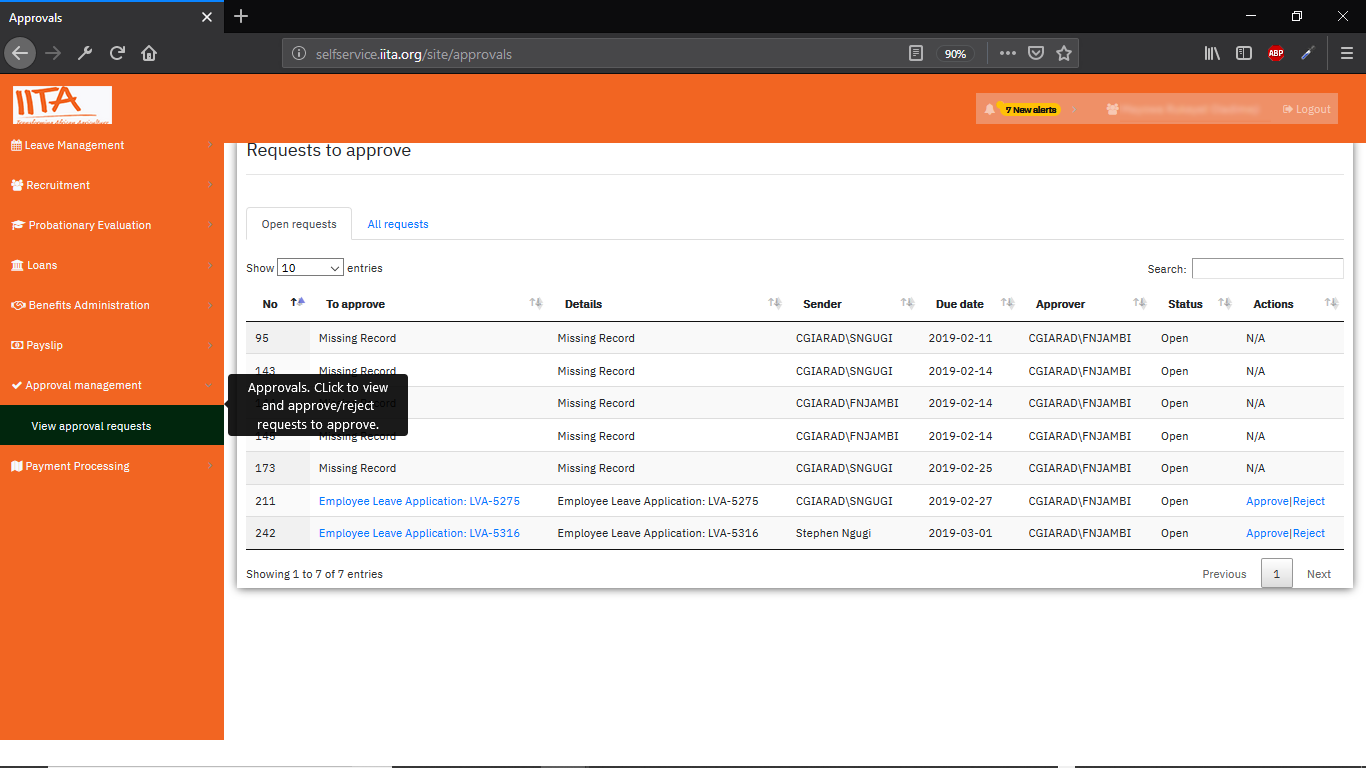
For each approval entry, you can use the Approve or Reject link to make an approval decision, appropriate messages are sent to request sender and the supervisor.
